Embroidery Stabilizers for Beginners
Hi, I’m Susan from Sewfeet.com and today we’re talking about stabilizer basics. Embroidery stabilizers are a key element in machine embroidery. They provide a firm foundation that can support the thread that is used to create the design being stitched. Without them, the fabric would be puckered around the design once it is un-hooped, and the stabilizer is removed. I’m going to start with my three go-to stabilizers that are good to always have on hand. Here are three stabilizers I use on a regular basis. I have other stabilizers that are more specialized for specific embroidery situations, but these are my every day, mainstream, often-used stabilizers that I make sure that I am never without. These three stabilizers are great to start with if you are new to machine embroidery.
n
Embellish Soft Cutaway

Most cutaway stabilizers are stiff with a lot of body. This may be useful if you need some structure in your project. But there are times when I want the support of a cutaway but without the stiffness and this soft cutaway is perfect for that. It is very stable with no stretch in any direction. After stitching, trim away the stabilizer, leaving about ¼” around the design. The rest of the stabilizer remains behind the stitched design.
n
Floriani Medium Tearaway
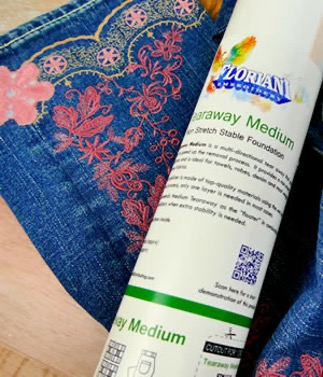
I like this stabilizer because it works for most projects that need a tearaway stabilizer. Crisp, but not stiff, it tears easily and cleanly away from the stitching. Tearaway is similar to cutaway but is more paper-like and tears easily. If using more than one layer of tearaway, it is best to remove the layers one at a time.
n
Floriani Water Soluble Topping

A great stabilizer to use when you are stitching terrycloth, velvet, or other textured fabrics. An easy way to keep this in place on top of your hooped fabric is to wet the corners of the topping and then stick them to the fabric in the hoop. Typically, toppings are a film or mesh that dissolves with water. After stitching, trim the excess stabilizer from around the design and then rinse the project until the stabilizer completely is dissolved.
n
Six Embroidery Stabilizer Facts and Tips
Before the home embroidery machine came about, stabilizers were used by commercial embroiderers. They were called backings because the majority of stabilizers are placed on the back of the fabric. The term used by the home machine embroidery industry is stabilizer.n
n
Determining the type of stabilizer and the amount your project requires takes some testing using your project fabric with a variety of stabilizers until you find the stabilizer for that works best for your project. The more you work with stabilizers, the more intuitive it becomes.

The only hard and fast stabilizer rule is that knit fabrics, including t-shirts and sweatshirts, require cutaway stabilizers. It provides a very stable foundation for stitching. Woven fabric may use a variety of stabilizer types, depending on the fabric and the project.

Use commercial quality stabilizers made by reputable embroidery companies. These stabilizers contain silicone, which lubricates the needle as you sew, reducing the wear and tear on the needle and the machine. Substitutes such as paper, coffee filters, freezer paper, etc. are not recommended as they may contain other materials such as cellulose (wood pulp) that can be harmful to your machine.

n
n
When stitching a fabric that has a nap or pile to it such as velvet, terry cloth, or corduroy, you will need the stabilizer behind the fabric plus an additional stabilizer on the surface of the fabric. Called a topping, this stabilizer keeps the stitches from sinking into the loops of the fabric. These work with fabrics that can handle moisture and dampness because toppings are water soluble so they can be completely removed after your stitching is complete.n
n
The last five tips have been referring to using stabilizers for machine embroidery, but another use is with your sewing machine for decorative stitching. It keeps your fabric nice and flat with no puckering or tunneling as you stitch. It goes behind the fabric, the same as for embroidery and can be removed by tearing or cutting it away, depending on they type you are using.